How to Field Dress a Deer: A Step-by-Step Guide That Won’t Waste Your Meat
Getting a deer on the ground is only half the job — what you do in the next hour determines whether that venison feeds your family all winter or ends up in a trash bag. Field dressing is a skill every hunter needs to own, and it’s not complicated once you’ve done it a few times. Here’s exactly how to do it right, whether you’re in a cold-weather Northern camp or dropping a buck in 85-degree Alabama heat in October.
Why Field Dressing Matters (And Why Speed Matters More in the South)
A living deer runs at about 101°F. The moment that animal expires, bacterial growth begins. The USDA’s bacterial danger zone runs from 40°F to 140°F — and in the Southern states, where early archery seasons open in August and September, you’re almost never hunting in air that stays below 40 degrees. That means you’re working against the clock from the second the deer drops.
Northern hunters can sometimes afford to tag out and take a photo before starting the job. Southern hunters often cannot. If the temperature is above 60°F — which covers most of the early-season hunting across Mississippi, Georgia, Alabama, Arkansas, and the Carolinas — you have roughly one to two hours before meat quality starts declining. Above 70°F, that window shrinks to 30–60 minutes before you should have the carcass opened and cooling.
Know your window. Then work inside it.
Temperature vs. Time: How Long Do You Actually Have?
This is the table every Southern deer hunter should commit to memory. These windows assume you’ve field dressed the deer and are working toward getting it on ice or into a walk-in cooler.
| Ambient Temperature | Safe Window After Field Dressing | Recommended Action |
|---|---|---|
| Below 40°F | 24–48 hours | Traditional hang aging is viable; monitor temperature |
| 40–50°F | 6–12 hours | Get to a cooler or processor same day |
| 50–60°F | 2–4 hours | Ice immediately; prioritize cooler over butcher shop timing |
| 60–70°F (common early seasons) | 1–2 hours | Quarter in field if transport time exceeds 1 hour |
| Above 70°F (Southern August–October) | 30–60 minutes | Field dress within 30 min; quarter and bag on ice within 1 hour |
Sources: USDA food safety guidelines; Penn State Extension; Wisconsin DATCP
The Penn State Extension’s recommendation is to cool the carcass to 35–40°F as quickly as possible. Wisconsin DATCP specifically advises that if air temperature exceeds 41°F, you should pack the carcass with clean ice immediately. For Southern hunters doing early archery in August, this isn’t just advice — it’s the difference between good venison and a spoiled carcass.
What You Need Before You Start
Before you walk up to the deer, have these items staged and accessible. Digging through a pack with bloody gloves is a bad habit. See our best deer hunting gear guide for 2026 for specific knife recommendations and cooler setups worth carrying.
Tools:
– Fixed-blade knife with a 3–4 inch blade (sharp — a dull knife is slower and more dangerous)
– Nitrile or latex gloves — wear two pairs. The outer pair comes off dirty; the inner pair stays clean for handling meat
– Bone saw or small hacksaw (optional — more on when to skip it below)
– Rope or paracord to position and hang the deer
– Clean water and sanitizing wipes
– Heavy-duty garbage bags for organs
– Zip ties or paracord to tie off the bung
– Clean plastic bags or game bags for meat quarters if conditions require it
How to Field Dress a Deer: Step by Step
Step 1: Confirm the Deer Is Dead
Approach from behind. Watch for chest movement. If the eyes are open and glassy, no movement, no breath — you’re clear. Do not walk up to a deer from the front if there’s any doubt. Use a stick to touch the eye; if there’s no blink reflex, the animal is gone. This isn’t paranoia — a wounded deer can kick hard enough to break your leg.
Step 2: Glove Up Before You Touch Anything
Both pairs of gloves go on before your hands contact the deer. This isn’t about squeamishness — it’s about CWD precaution and basic hygiene. We’ll cover CWD in more detail below, but the short version is: the prions responsible for Chronic Wasting Disease can transfer through contact, and you want a barrier between your skin and any tissue, fluid, or organs.
Step 3: Position the Deer
Get the deer on its back on the flattest ground available, or use a slight slope with the head uphill. Gravity is your friend when the organs want to come out. Spread the hind legs and prop them open — a stick wedged between them works, or have a hunting partner hold them. The more the cavity opens up, the easier this goes.
Step 4: Make the Bung Cut
This is the step most hunters either skip or do poorly, and it causes 80% of field dressing contamination problems.
Circle the anus with your knife, cutting approximately 2–3 inches deep all the way around to free the rectum from the surrounding tissue. Work slowly and deliberately — you do not want to nick the intestine. Once freed, pull the rectum out slightly and secure it with a zip tie or piece of paracord. This prevents fecal matter from entering the body cavity when you pull the organs.
On does, extend this cut to include the vaginal opening as well.
Some hunters use a bung plug (a rubber device designed specifically for this purpose) instead of tying off. Either approach works. The goal is containment.
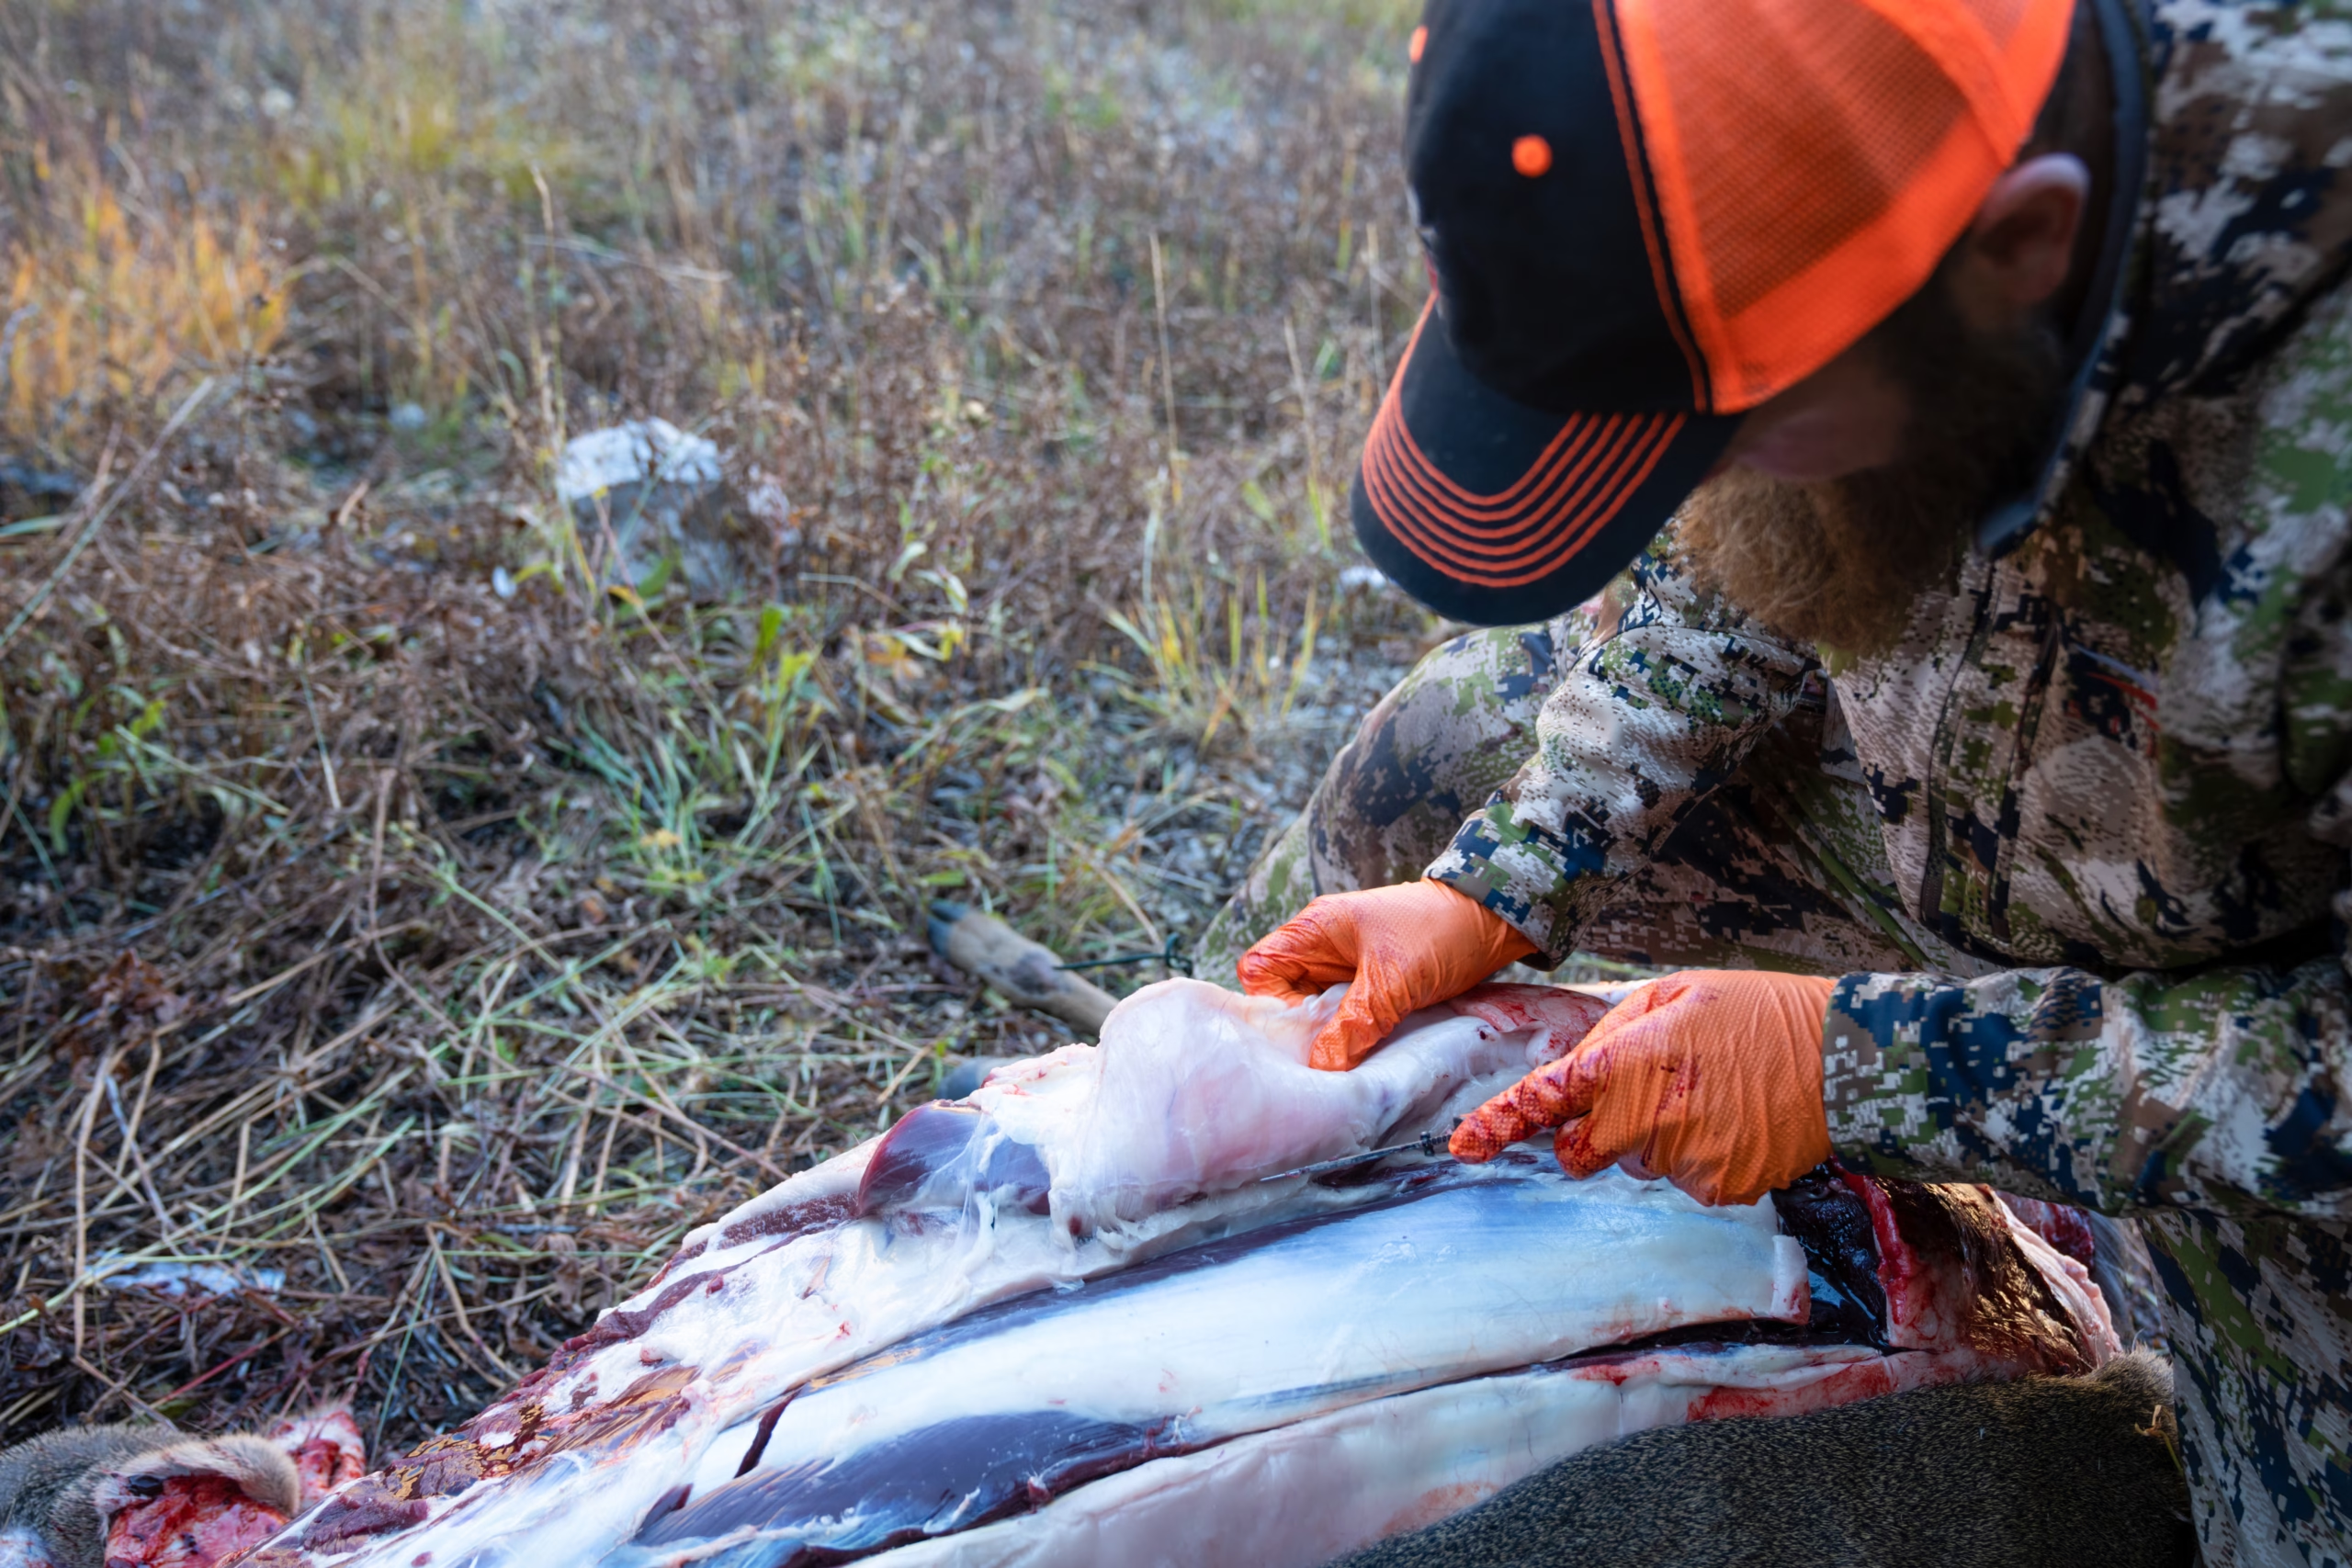
Step 5: Open the Belly
This is the incision most people picture when they think about field dressing. Done correctly, it’s clean and fast.
Starting near the breastbone, use two fingers inserted under the skin to create a “tent” — lifting the skin and muscle away from the stomach below. Insert your knife blade-up between your fingers and run it down toward the pelvis. Keep the blade angled upward throughout the cut. You’re not sawing down into the body; you’re unzipping the belly wall while your fingers act as a guide and guard.
A punctured stomach or intestine isn’t the end of the world, but it will complicate cleanup significantly and can transfer bacteria to the meat. Take your time on this cut. Move your fingers as you go rather than trying to make a single long slice all at once.
Step 6: Split the Pelvis (Optional)
Older hunters often split the pelvis with a bone saw to make organ removal easier and allow better cooling airflow through the cavity. Modern hunters increasingly skip this step, partly for cleanliness (splitting bone creates fragments and splatter) and partly as a CWD precaution — more on that below. If you’re hunting an area with confirmed CWD, skip the bone saw entirely.
If you do split the pelvis, do so carefully and rinse the area thoroughly afterward.
Step 7: Sever the Windpipe and Esophagus
Reach as far forward into the chest cavity as possible — past the diaphragm, up through the rib cage — and locate the windpipe and esophagus. Sever them as far forward as you can reach. This separates the “plumbing” from the front end so you can remove everything as one connected mass.
If you can’t reach far enough, make a chest opening cut to access the rib cage directly. Some hunters cut through the sternum with a bone saw; others cut between ribs with a knife. Either opens up the chest cavity for access.
Step 8: Remove the Organs
With the bung tied off and the windpipe severed, the organs should come out as a single connected mass when you reach in and begin rolling them toward the opening. Work from the front of the cavity toward the back. If something is hung up, feel for the attachment point and cut it free.
Direct the mass into a garbage bag or away from the carcass if you’re on public land. Check your state regulations — some require organs to remain at the kill site for game check purposes; others allow removal.
Step 9: Remove the Heart and Lungs
The heart sits at the bottom of the chest cavity, forward of the diaphragm. If you want to save it — and you should, because a fried deer heart is one of the best meals you’ll get from that animal — bag it separately and get it on ice within 30 minutes. The lungs can be discarded.
Step 10: Clean and Prop the Cavity
Wipe out any blood, debris, or stomach content from the cavity. A clean rag works; sanitizing wipes are better. If you have water, rinse the cavity and wipe it dry — leaving standing water in the cavity promotes bacterial growth.
Cut or find a short stick (8–12 inches) and wedge it across the open cavity to prop it open. Heat escapes through the opening; a closed cavity traps heat and spoilage starts from the inside out.
Step 11: Transport and Hang or Quarter
If temperatures are below 40°F and you’re within a reasonable drive of home or camp, hang the deer by the hind legs in a shaded area and let it cool. Three to five days of hanging at 35–40°F will tenderize the meat noticeably.
If temperatures are above 50°F — which they frequently are during Southern early seasons — you need to decide quickly about quartering in the field.
Step 12: Quarter in the Field for Warm-Weather Conditions
For Southern hunters running August or September bow seasons, or anyone who kills a deer in 70-degree-plus weather, quartering in the field before transport is often the only option that doesn’t sacrifice meat quality.
Remove the shoulders, hindquarters, backstraps, and neck meat. Bag each piece separately in game bags or clean plastic bags. Pack on ice in a cooler immediately. Keep the cooler shaded and topped off with ice. The meat should be at or below 40°F within an hour of quartering.
SVG Diagram: Field Dressing Incision Guide
CWD Precautions: Don’t Skip This Section
Chronic Wasting Disease is a prion disease — similar in mechanism to mad cow disease — that infects the deer and elk population across an expanding geographic range. It’s been confirmed in multiple Southern states, and the range is growing. For a deeper look at what hunters need to know, read our piece on the growing threat of CWD in the Southeast.
Here are the field dressing precautions that apply to every hunter, in every state:
Do not cut through the spinal column or skull. The highest concentrations of CWD prions are found in brain and spinal tissue. A bone saw through the spine is also a contamination vector for your tools and your hands. Skip it.
Do not consume these tissues: brain, spinal cord, eyes, tonsils, spleen, or lymph nodes. This applies even in areas where CWD hasn’t been confirmed — the precaution costs nothing.
Double-glove. The inner pair stays clean throughout. The outer pair comes off into a bag after you’re done and goes in the trash.
Use dedicated field dressing knives. Don’t bring a deer gut knife back into your kitchen for food prep. Keep your field blades separate.
Sanitize tools after use. Remove all visible organic matter from the blade, then soak in a 40% bleach solution for at least five minutes. This is the CDC-recommended approach for inactivating prions on surfaces.
Know the signs of CWD. A deer that’s noticeably emaciated, stumbling, holding its head low, drooling excessively, or shows no fear of humans may be exhibiting neurological symptoms. Do not consume the meat from that animal. Contact your state wildlife agency — in most states you’re required to report suspected CWD animals.
Hanging vs. Quartering in the Field: The Southern Hunter’s Decision
In the upper Midwest or Northern Appalachians in November, hanging a deer for three to five days is standard practice. The cool air does the aging work, the connective tissue relaxes, and the flavor deepens. If you have consistent temperatures below 40°F, hang the deer by the hind legs in a shaded area and let it ride.
If you’re hunting in the South — and especially if you’re hunting early archery, which in many Southern states opens in August — quartering in the field isn’t just acceptable, it’s often the right call.
Break the deer down into quarters plus backstraps and neck meat. Use clean game bags to keep flies and debris off the meat. Pack each piece into a cooler on ice. Keep the cooler in the shade, add ice as it melts, and drain the meltwater regularly to keep meat from soaking in it. Soaking meat in water leaches flavor and promotes surface bacteria.
A good rule of thumb: if it’s still warm enough for insects to be active when you recover the deer, you’re quartering it.
Frequently Asked Questions
Frequently Asked Questions
How long does it take to field dress a deer?
For an experienced hunter, 15–20 minutes is a reasonable window for a complete field dressing job. First-timers might take 30–45 minutes, and that’s okay. The time pressure from ambient temperature means you want to work efficiently, but rushing a sharp knife through unfamiliar anatomy creates mistakes. Walk through the steps mentally before season starts — it makes a difference when you’re standing over an animal in the dark.
Do I have to field dress the deer before transporting it?
Legally, requirements vary by state. Many states require you to leave the evidence of sex attached to the carcass during transport, and some require proof-of-harvest documentation to remain with the animal. From a meat-quality standpoint: if you’re more than 20 minutes from a walk-in cooler and temperatures are above 50°F, you should at minimum open the belly cavity before transport to allow heat to escape.
What happens if I puncture the stomach or gut during field dressing?
Stay calm. A punctured stomach or intestine is messy and smells bad, but it doesn’t automatically ruin the meat. Flush the body cavity thoroughly with clean water. Wipe down any contaminated meat surfaces and let them dry. The surface bacteria from gut spillage can be managed with proper handling and normal cooking temperatures. If the contamination was extensive and the meat soaked in gut content for an extended period in warm temperatures, you may need to trim affected areas generously.
Can I eat the deer heart?
Yes, and you should try it at least once. A properly prepared deer heart is excellent table fare — most hunters who try it become converts. Remove it from the chest cavity and place it on ice within 30 minutes. Rinse it, trim the fat and connective tissue from the exterior, and cook it like a steak: hot cast iron, medium-rare, with butter and garlic. It’s one of the best things that comes off a deer.
What do I do with the organs I’m not keeping?
If you’re on private land, the gut pile can be left at the kill site. Scavengers — coyotes, vultures, foxes, raccoons — will clean it up within a day or two, and it’s a natural part of the ecosystem cycle. On public land, check your state regulations, as some areas require organ removal or have specific disposal rules. If you’re transporting organs off the property, keep them contained in a heavy-duty garbage bag.
Do I need a bone saw to field dress a deer?
No. A bone saw is optional equipment and, in CWD country, better left at home. The only steps where a saw is potentially useful are splitting the pelvis (which many hunters now skip) and splitting the sternum for chest access. A quality fixed-blade knife will handle the entire job if you work carefully, and avoiding bone cutting keeps CWD contamination risk lower and your tools cleaner.
Should I wash the inside of the deer cavity with creek or stream water?
No. Wild water sources carry bacteria that can contaminate the meat. If you need to rinse the cavity, use clean water from a container you brought with you. If no clean water is available, wipe down the cavity thoroughly with a clean cloth or sanitizing wipes and let it air dry. A dry, wiped cavity is meaningfully better than one rinsed with questionable water.
Hanging, Aging, and a Few Final Notes
If you’ve gotten the deer down, field dressed it, and have it moving toward a controlled temperature environment, you’re most of the way home. A few things worth adding:
Aging improves flavor and texture. At 35–40°F, hanging the carcass or bagged quarters for three to seven days allows natural enzymes to break down muscle tissue and develop flavor. Many commercial processors don’t have the space or time to age meat properly — if you have access to a walk-in cooler or can manage reliable cooler temperatures, consider aging the meat yourself before butchering.
Field dressing is a skill that improves with repetition. Your third deer will go faster and cleaner than your first. Don’t let a messy first experience put you off — every experienced hunter has a first-deer story that involves some amount of chaos.
Teach someone else. The best way to lock in the process is to walk a new hunter through it. The questions they ask will make you articulate things you’ve been doing on instinct, and you might learn something in the process.